"You can just fix that later right?" Or "In photoshop you can do anything". Most professional photographers hear this statement about 100 times a year. This gets asked mostly because of the wide spread articles of how photoshop is used to make someone skinnier, or change their shirt color, hair color, or heck, even skin color. There are even video's that show the effect of photoshop and how easy it is to just "fix it later".
Now I am definitely one that has used my share of the "easy" button, and just left it to fix later. But really does it actually make it easier? Had I just paid attention more and removed that speck of food crumb from my son's face before I took the photo, I would have his beautiful portrait printed almost instantly. Instead, I have to go into my editing software(I use both Lightroom and Photoshop) and remove it. This does only take a second or two. But what if I need to do that on 25 photos? AUGH..my bum hurts thinking about sitting at my computer doing that.
As a professional photographer who started my business in 2008, I have always stood by the philosophy that you should get everything as close to perfect in camera FIRST and then do any enhancements in photoshop later. This is what I have carried with me as I learn and grow in my career. As a professional, I should know how to get my desired photograph correct with lighting, posing, and exposure before I even click that shutter. I strive to do this b/c I want to give my clients the best image of themselves and their family. No photoshop required.
This week I photographed a past high school senior for a modeling portfolio. I have photographed Maggie numerous times over the last couple of years, and she really is a true beauty. She has amazing long lashes, stunning green eyes, and skin that is just so smooth. Now for these photos, I started by doing Maggie's makeup. For beauty images, I wanted to keep it very simple and to not change her look too much with make up. Having makeup professionally done before any type of session helps ensure that you get the best skin tone for your portraits. This is just one step to getting it correct in camera(yes, even for you guys out there!). Tip: Make sure you choose a professional makeup artist who is familiar with makeup for portraits.
The next step, I want to make sure I have the proper exposure, lighting, and white balance for my subject. These change dramatically between situations and lighting sources. I believe all working professional photographers should have extensive knowledge in this area. After all, photography is the study of light. If you don't know how to light your subject to make them look their best, I do not believe you can "fix it" later in photoshop. It will always just be a photo that wasn't exposed, or lit very well. And really, why would you pay someone to do something that isn't correct?
For Maggie's beauty images, I chose a very soft light to showcase her skin, eyes, and dark hair. I didn't want very dramatic lighting, so I used my large soft box and had it very close to her. It makes a very soft pretty light. I have two light sources, in these photos. One main light camera left, and a background/hair light. I also used a reflector to help fill in any unwanted shadows.
So why did I go over this all? I wanted to show you the before photo that is straight out of the camera(also referred to as SOOC), and then my retouched version. I believe there shouldn't be very much retouching needed when you know what you are doing and get the correct image the first time. I will explain the retouching on each photo! Here we go!
Photo 1:
The Left image in all of the side by side pics is the SOOC image, the right is the retouched version. Having them side by side really shows there is not a whole lot that I did. I do always fix stray hairs. They bug me. I try to use hair spray to keep them at bay, but I have a very quick way to retouch these, so if the hair spray is not handy, I will remove these in retouching. Next I removed any bumps or blemishes. This doesn't define a person and I don't want it to serve as a reminder of what zit popped up that day. Maggie however, didn't really have any. Her skin was amazing to start with, and a little makeup helped clear up any discoloration. I did a small amount of skin smoothing. However, I did whiten the whites of her eyes a little. Mostly because she had just had Lasik surgery done and her eyes were sensitive,, making them appear redder than normal. I don't do this on many people, and I don't do it very much. If you whiten someones eyes too much, they look very creepy!
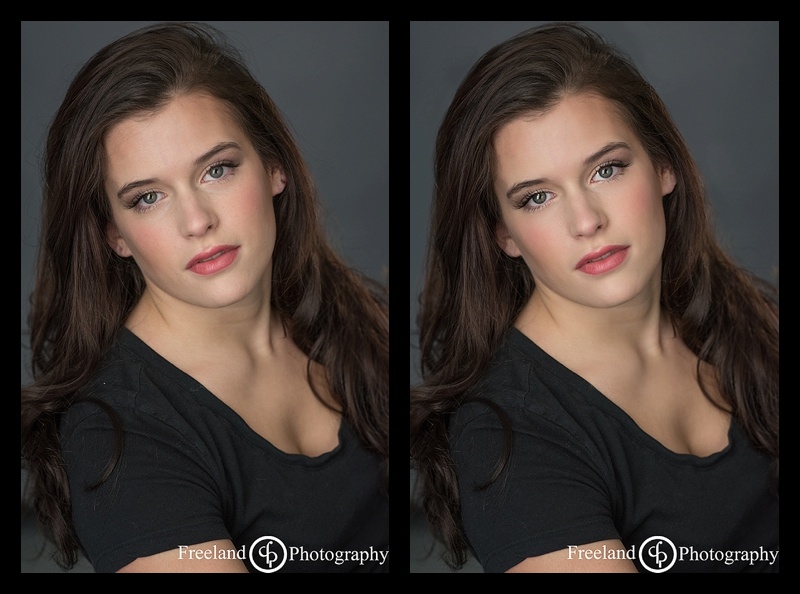
Photo 2: I did the same basic retouching here, as I did in the first photo. However, this one I lightened the shadows in her hair a little bit, so you could see more of the strands. And I also fixed the top left dark spot and tried to match it on the right side some so it was more even.
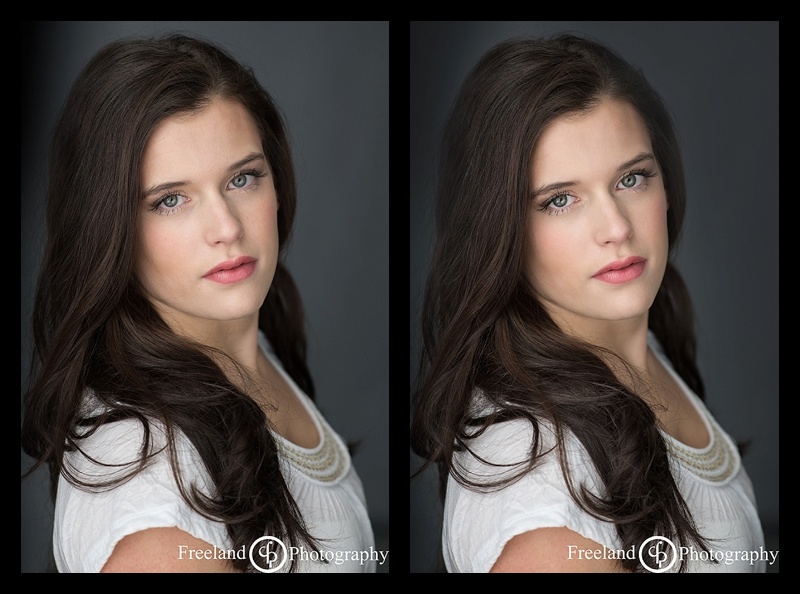
Photo 3:
Same basic edits as the first two, with a little bit more reducing shadows under her eyes. I don't ever like to get rid of completely any shadowing under the eyes. It can make someone not look human getting rid of all shadows or lines.
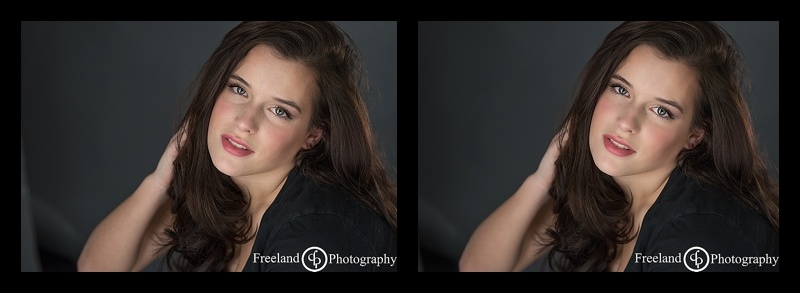
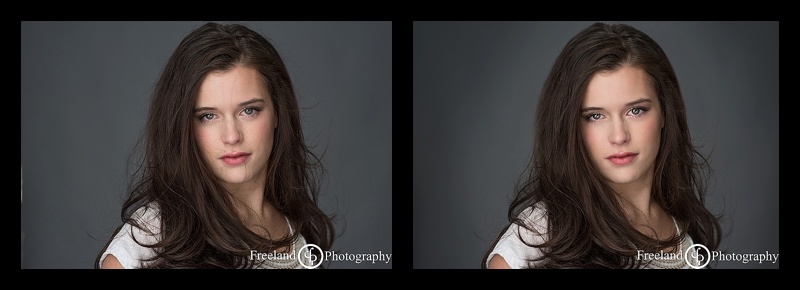
Photo 4:
This photo did take a little longer to retouch, and looks the most different between the SOOC and the retouched version. Mostly because we were using some "wind" to get her hair to move and there were a lot of little pieces flying around. I don't like a lot of stray hairs across the face, so I retouched most of those out. Then I did the same basic edits as the other 3. I did whiten her eyes a little more as the wind was making them more red than the others.
I did this blog post because I wanted to show that when you have a really great image straight out of camera, you don't need to do much to it in retouching. So the first thing I always recommend to anyone learning photography, or who wants to become a photographer. Learn the craft. Learn how to properly expose a photo, light a scene, and have correct white balance. All of this will make your photos better, b/c then you will be able to focus on more creative things, and not just trying to get a "good" photo!
Hope you enjoyed:) Until Next time!-Carrie